Update Sets
What is an update set?
An update set records the configuration changes you make in an instance, so they can be applied to another instance.
Update sets carry configuration only, not data like users, groups or incidents.
Why is an update set?
We build in Dev, test in Test, and release to Prod. Update sets move the same change across each instance without rebuilding it, and the preview step catches conflicts before anything is committed.
When is an update set?
Use an update set whenever a configuration change made in one instance needs to reach another. The common cases are:
- Dev to Test: once development is finished, the change moves to Test so QA can verify it in a separate environment.
- Test to Prod: after testing and sign-off, the same update set is moved to Production as part of the planned release.
- Hotfix to Prod: an urgent fix is built and tested in a lower instance, then moved to Production outside the normal release cycle.
How is an update set?
Build and complete the update set on the source. The target then retrieves it through the update source, previews it, and commits it.

Step 1: Create the update set (source)
- Go to System Update Sets > Local Update Sets > New.
- Give it a clear name, e.g. STRY0012345 – Laptop request, and check the Application scope.
Never use or move the Default update set.
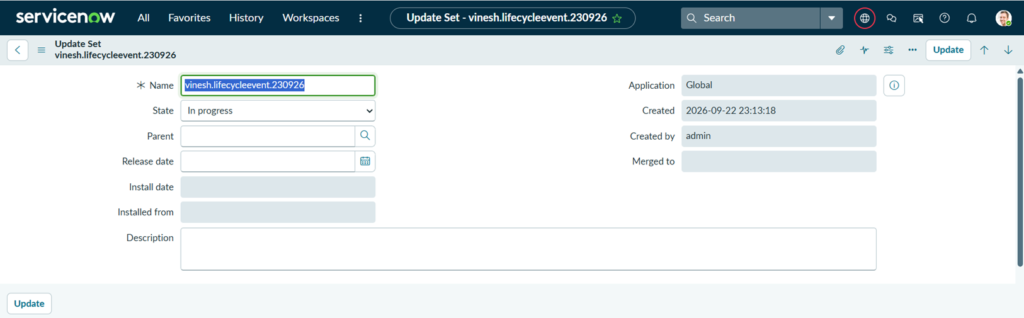
Step 2: Make it current.
After submitting the update set,open it again and click on make it your current update set
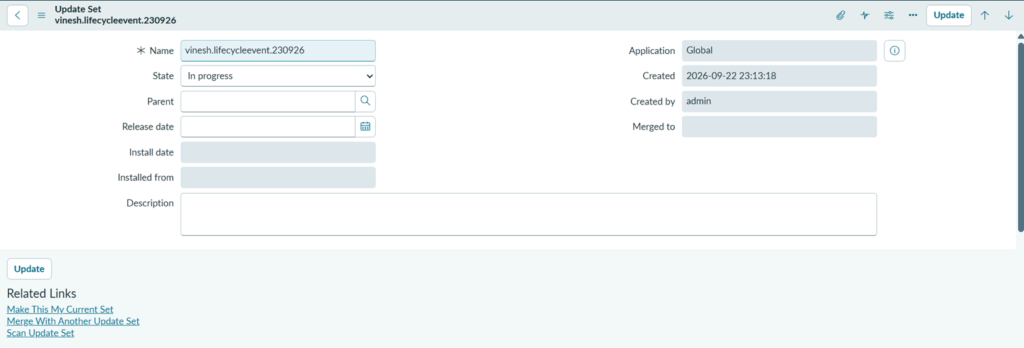
Step 3: Mark it Complete
Switch back to Default, open the update set, and set State to Complete. The target can’t see it until it’s Complete. If you missed something, create a new update set rather than reopening this one.

Step 4: Export to XML
After changing its state to complete click on the export to XML file option to move the file to another instance.

Step 5: Import Update Set.
- Go to System Update Sets > Retrieved Update Sets.
- Under Related Links, click Import Update Set from XML.

Step 6: Uploading XML file.
Choose the XML file you exported from the previous instance and click on upload button

Update Sources
What is an update source?
An update source is a record on the receiving instance that stores the login of the instance you pull from.
Why is an update source?
Without an update source, every update set has to be exported as an XML file from the source and imported manually on the target. An update source removes that manual step. Completed update sets come across in one click, which saves time and avoids missing or wrong files.
When is an update source?
Use an update source when the two instances can connect to each other and update sets are moved between them regularly, for example from Dev to Test or Test to Prod. It only needs to be set up once for each pair of instances. If the instances can’t connect, for example because of network restrictions, use XML export and import instead.
How update source is used?
Step 1: Create the update source
On the target instance, go to System Update Sets > Update Sources and click New. Enter a Name, select the Type, enter the source instance URL (e.g. https://dev401979.service-now.com), and the username and password of an admin account on the source instance.
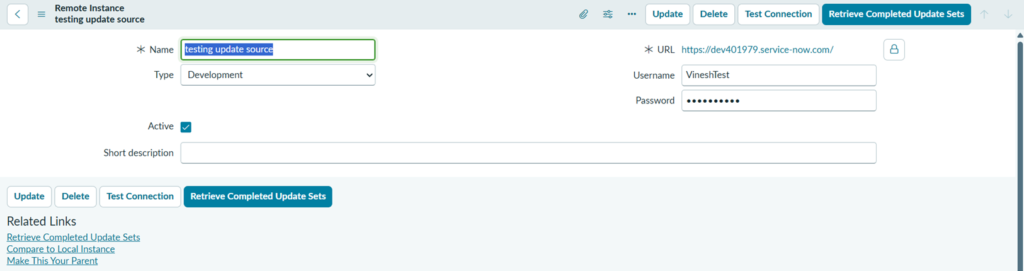
Step 2: Test the connection
Click Test Connection to confirm the details are correct, then click Submit.
Step 3: Retrieve the update sets
Open the update source and click Retrieve Completed Update Sets. The completed update sets from the source instance appear under the Retrieved Update Sets tab.

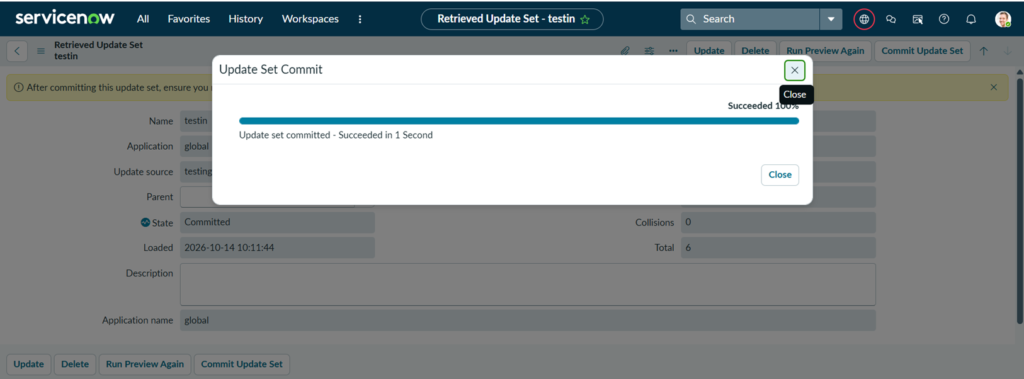
Step 4: Commit the update set
Open the update set you need, e.g. “testin”, and click Commit Update Set. Once the commit succeeds, the State changes to Committed.