What Are Import Sets and Data Sources?
External data never goes straight into production tables. It lands first in a import set table, where you can look at it, check it, and fix problems. Only then it is mapped to a target table by a Transform Map.
Why Do We Use Them?
Loading into a table keeps raw data away from production tables until you have looked at it. You get a record of every load, the ability to repeat the same load, and one consistent model whether the source is CSV, Excel, XML. Problems such as duplicates, blanks, and bad formats are found in staging, where they are cheap to fix.
When Do We Use Them?
- Initial data migration during an implementation.
- Recurring feeds.
- Bulk updates from spreadsheets owned by business teams.
- Integrations where an external system pushes rows into ServiceNow.
How Do We Use Them?
The worked example below loads an employee CSV from an external HR system into a table, checks it, and reviews the logs. Each step shows where to place your PDI screenshot.
Example
The following practical example uses an Excel department directory to demonstrate the complete process: creating a Data Source, loading records into an Import Set table, creating a Transform Map, and comparing the results with and without Coalesce. Capture screenshots from your own PDI at the marked locations.
Step 1:
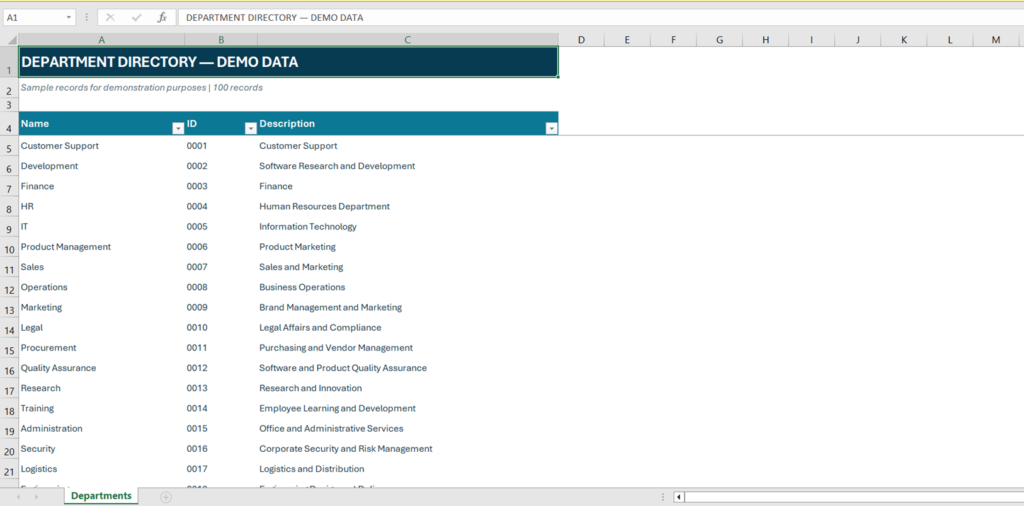
1. Create an Excel workbook and save it as department_directory.xlsx.
2. Use one worksheet with a single header row containing Name, ID, and Description. Do not use merged cells in the header.
3. Enter the ten department records shown below.
4. Format the ID column as Text so leading zeros such as 0001 are preserved.
5. Save and close the workbook before uploading it.
Step 2:
1. Log in to your ServiceNow PDI as an admin.
2. In the Application Navigator, type System Import Sets.
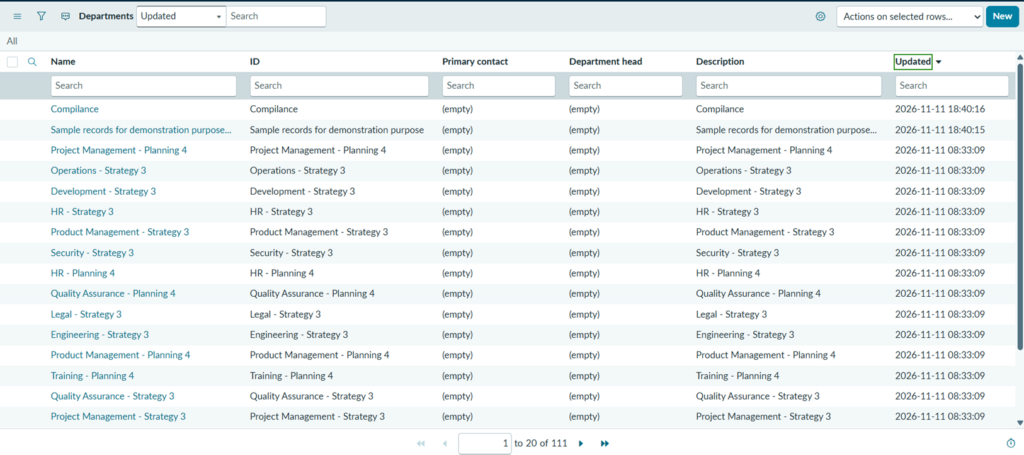
3. Before importing, type cmn_department.list in the navigator and press Enter.
4. Review the existing Department records and note the current record count. This is the baseline for comparing the transform results.
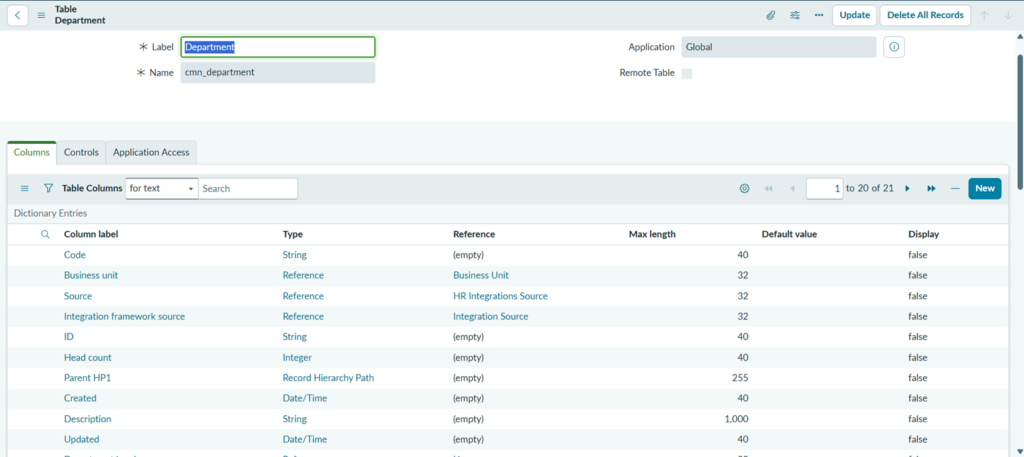
5. If needed, open System Definition > Tables, search for cmn_department, and verify that the Name, ID, and Description fields are available.
Step 3:
1. Navigate to System Import Sets > Administration > Data Sources.
2. Click New.
3. Configure the Data Source using the values in the table below. Field labels may vary slightly by ServiceNow release.
4. Click Submit or Save, then open the saved Data Source record.

Step 4:
1. On the Data Source record, remove any older attachment so that the correct file is processed.
2. Click the paperclip (Manage Attachments) icon and upload department_directory.xlsx.
3. Confirm that the correct file name appears in the attachment list.
4. Click Test Load 20 Records only if you want to check the setup. For the actual exercise, click Load All Records.
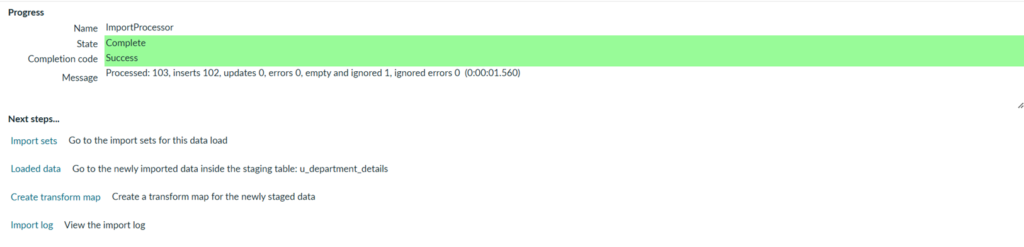
5. Wait for the load to complete. Note the new Import Set number and confirm that the number of loaded rows matches the ten data rows in the Excel file.
Step 5:
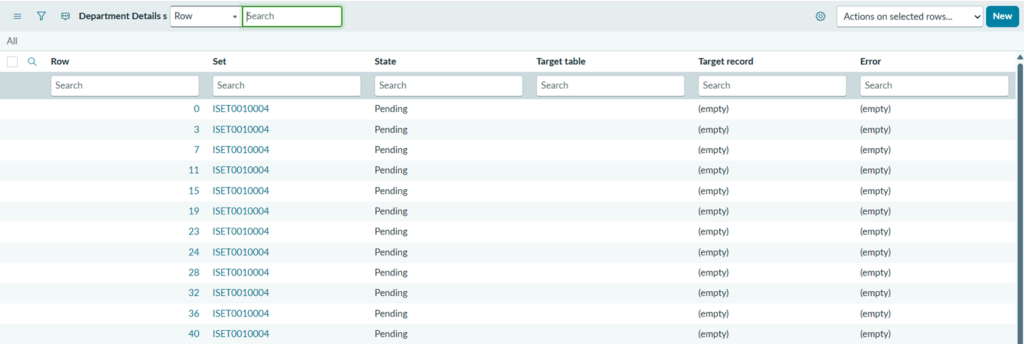
1. Open the staging table using u_department_details_excel.list. Confirm the exact table name from your Data Source record.
2. Verify that the Excel headers have become columns, for example u_name, u_id, and u_description.
3. Compare a few staging rows with the Excel file.
Step 6:
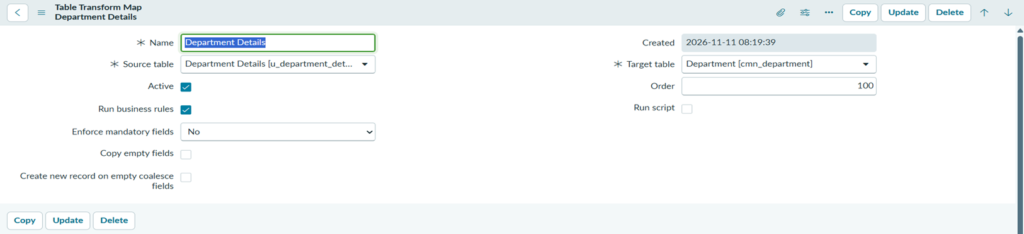
1. Navigate to System Import Sets > Transform Maps, or type sys_transform_map.list in the Application Navigator.
2. Click New.
3. Enter the Transform Map details.
Step 7:
1. In the Field Maps related list, click New (or use Mapping Assist).
2. Create the three field mappings shown in the table below.
3. For this first run, leave the Coalesce checkbox unticked on all three field maps.
4. Save the mappings and confirm that all three appear in the related list.

Step 8:
1. Navigate to System Import Sets > Import Sets and open the Import Set created by Load All Records in Step 4. Do not select a separate test-load Import Set.
2. Click the Transform related link, select Department Excel to Department, and click Transform.
3. After the transform completes, note the inserted, updated, ignored, and error counts.
4. Open the Import Set Rows tab or related list and inspect the State and Target record for each row.
5. Open cmn_department.list and compare the results with the baseline recorded in Step 2.

Step 9:
1. Edit department_directory.xlsx. Keep the Name and ID values unchanged for the existing departments.
2. Change the Description for three existing departments, for example IT, Finance, and HR.
3. Add one new row: Compliance | 0011 | Regulatory Compliance.
4. Save the workbook. Return to the Data Source, remove the old attachment, and upload the updated Excel file.
5. Click Load All Records and note the new Import Set number.
6. Open the new Import Set and confirm that it contains eleven rows.


Step 10:
1. Open the Department Excel to Department Transform Map and go to the Field Maps related list.
2. Open the ID (u_id) to ID field map.
3. Select the Coalesce checkbox and click Update or Save.
4. Leave Coalesce unticked on the Name and Description field maps.
5. Use ID as the coalesce field because it uniquely identifies each department in this example.

Step 11:
1. Navigate to System Import Sets > Import Sets and open the second Import Set created in Step 9.
2. Click Transform, select Department Excel to Department, and run the transform.
3. After the transform completes, note the inserted, updated, ignored, and error counts.
4. Inspect the Import Set Rows states and Target record references.
5. Open cmn_department.list and verify that the existing IDs have been matched, the changed descriptions are reflected, and Compliance (0011) has been inserted as a new department.