
What is a mail script?
A mail script is a small piece of server-side JavaScript that builds part of an email notification at the moment the email is sent. You write it once under System Notification > Email > Notification Email Scripts
Why use one?
A normal notification can only show fields from its own record, like ${number}. Mail scripts let you do more:
- Fetch data from other tables, like the caller’s location
- Show different text based on conditions
- List related records, like tasks or approvals
- Reuse one script across many emails
When to use one
Use a mail script when the email needs something a simple field variable can’t give you.
| Situation | Mail script needed? |
| Show the incident number and short description | No, use ${number} and ${short_description} |
| Show the caller’s location or manager | Yes, the data sits in another table |
| Change the message based on a condition | Yes |
| List all open child tasks or approvals | Yes |
| Same custom block reused in several emails | Yes |
How to create one
- Go to System Notification > Email > Notification Email Scripts and click New.
- Give it a clear name with no spaces, for example caller_location_info.
- Write your code inside the default function that ServiceNow provides.
- Save it.
5.Open your notification, go to the What it will contain tab, and add ${mail_script:caller_location_info} where the content should appear.
Step 1: Create the mail script
Name: caller_location_info

Step 2: Create the notification
Go to System Notification > Email > Notifications and click New.
- Name: Incident caller from USA
- Table: Incident [incident]

Step 3: Set when to send
On the When to send tab:
- Send when: Record inserted or updated, with Inserted ticked
- Conditions: State is New
- Advanced condition:
var user = new GlideRecord(‘sys_user’);
if (user.get(current.caller_id)) {
answer = (user.location.getDisplayValue() == ‘USA’);
} else {
answer = false;
}
The email only goes out when answer is true.

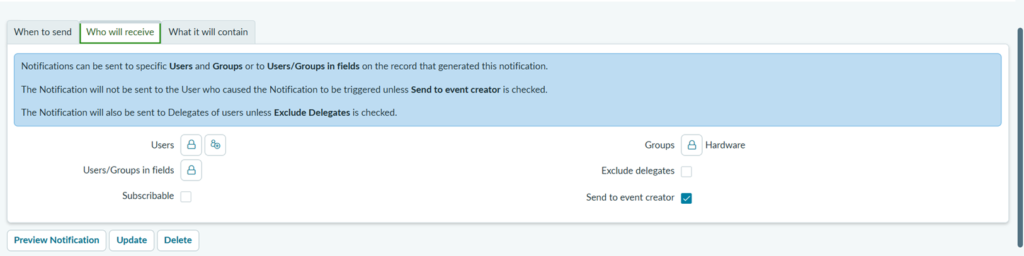
Step 4: Set who receives it
On the Who will receive tab:
- Users/Groups in fields: Caller
- Groups: your support group
Step 5: Call the mail script in the body
On the What it will contain tab, add this to Message HTML:
${mail_script:caller_location_info}

Step 6: Preview notification
For an incident raised by a caller whose location is USA, the email looks like this:
