
What is Agentic AI?
Agentic AI in ServiceNow refers to autonomous AI agents that can independently think, plan, and take actions to complete tasks , not just like a chatbot. These agents work within the Now Platform using the AI Agent Orchestrator, coordinating with each other to handle complex workflows across ITSM, HR, and CSM. They can pull data, make decisions, and execute steps end-to-end with minimal human input.
- Uses AI Agent Orchestrator to manage multiple agents
- Performs multi-step tasks, not single responses
- Works across ITSM, HR Service Delivery, CSM modules
- Includes guardrails for human-in-the-loop control
Why Agentic AI is used?
Agentic AI matters because it speeds up service delivery while reducing the manual burden on support teams. It ensures consistent, round-the-clock handling of tasks that would otherwise need constant human attention. This leads to better efficiency, cost savings, and improved satisfaction for both employees and customers.
- Reduces resolution time
- Cuts down manual/repetitive work
- Available 24/7 with consistent output
- Lowers operational costs
When is Agentic AI used?
Agentic AI should be adopted where tasks are repetitive, time-sensitive, or span multiple teams, and where the organization already has clean data and governance in place. It’s best introduced through a small pilot before expanding to larger, more complex workflows.
- For high-volume, repetitive requests
- For cross-department processes
- When quick response time is critical
- When CMDB/knowledge base data is well-structured
- After Now Assist and governance are set up
- Starting with a pilot use case before scaling
How is Agentic AI used?
Agentic AI in ServiceNow is brought to life through AI Agent Studio, a dedicated workspace that allows users to design, configure, and deploy autonomous AI agents without writing complex code. Below is a step-by-step walkthrough of how an AI agent is created and tested within the platform.
Step 1: Open AI Agent Studio
Start from the ServiceNow instance homepage and navigate to AI Agent Studio. This is the central hub where all agent creation and management takes place.
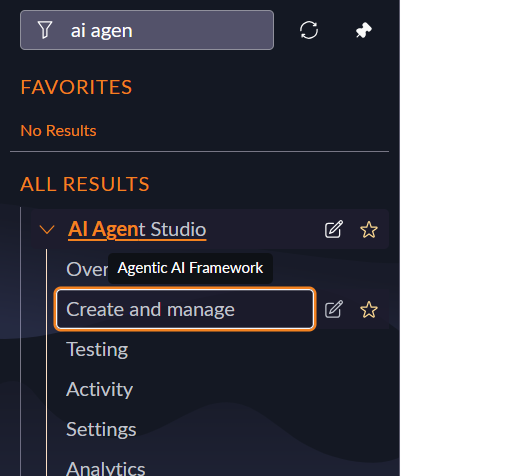
Step 2: Access the AI Agent Studio Dashboard
Once opened, AI Agent Studio displays the workspace where existing agents can be viewed, managed, or where a new agent can be created.

Step 3: Create a New AI Agent
Click the New button to begin creating a new AI agent from scratch.
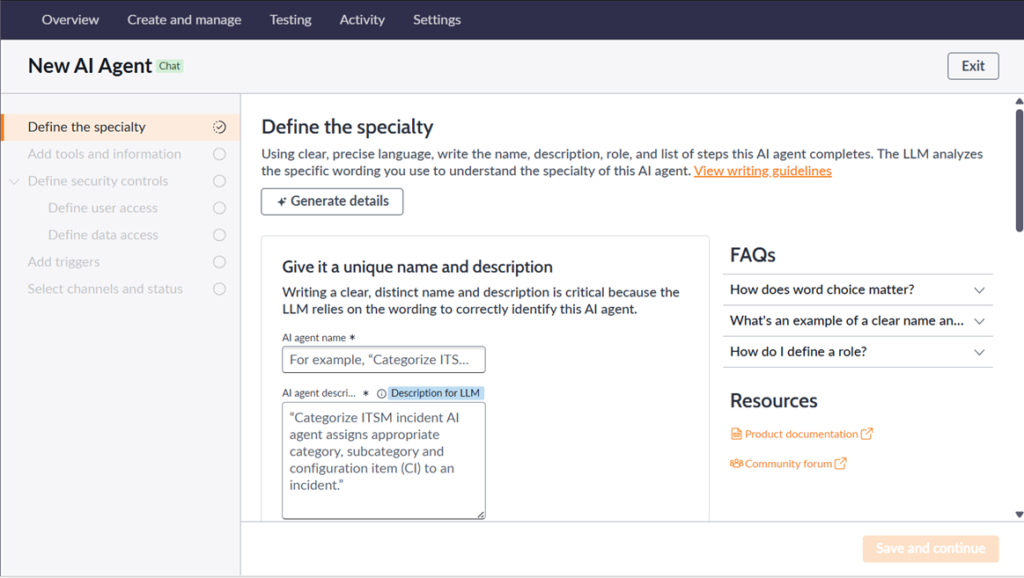
Step 4: The following details should be given:
– Agent Name: VB Recurring Incident Problem Creator Description: Scans incidents for recurring patterns, creates a Problem record summarizing the likely root cause, links related incidents to it, and notifies the Problem Management team for review.
– Steps: 1 – First scan incidents from the past 30 days and detect recurring
clusters where a category and subcategory combination has 3 or more similar incidents.
2 – Fetch the short description and description details for all
incidents in the strongest detected cluster.
3 – AI agent will analyze the incident details and determine the likely common root cause.
4 – AI agent will create a new problem record with the root cause statement, category, subcategory, and priority based on incident count.
5 – AI agent will link all related incidents from the cluster to the newly created problem record.
6. Call “To Link Incidents to Problem”, passing incident_sys_ids as a single comma-separated string built from the sys_id field of every incident returned in step 3 (no spaces, no brackets, no quotes — just sysid1,sysid2,sysid3 format), and problem_sys_id as the exact sys_id value returned by step 5.

Step 5: Configure Tools
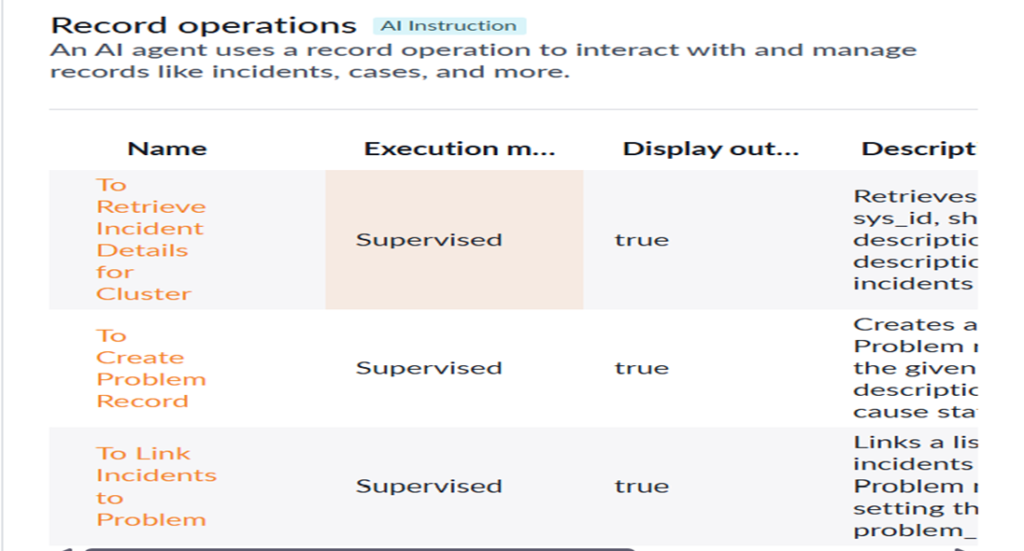
Record Operations
Tool: To Retrieve Incident Details for Cluster
Execution mode: Supervised
Display output: true
Description: Retrieves sys_id, short_description, and description for incidents in the cluster.
Tool: To Create Problem Record
Execution mode: Supervised
Display output: true
Description: Creates a Problem record with the given short description
and root cause statement.
Tool: To Link Incidents to Problem
Execution mode: Supervised Display output: true Description: Links a list of incidents to a Problem record by
setting their problem_id.
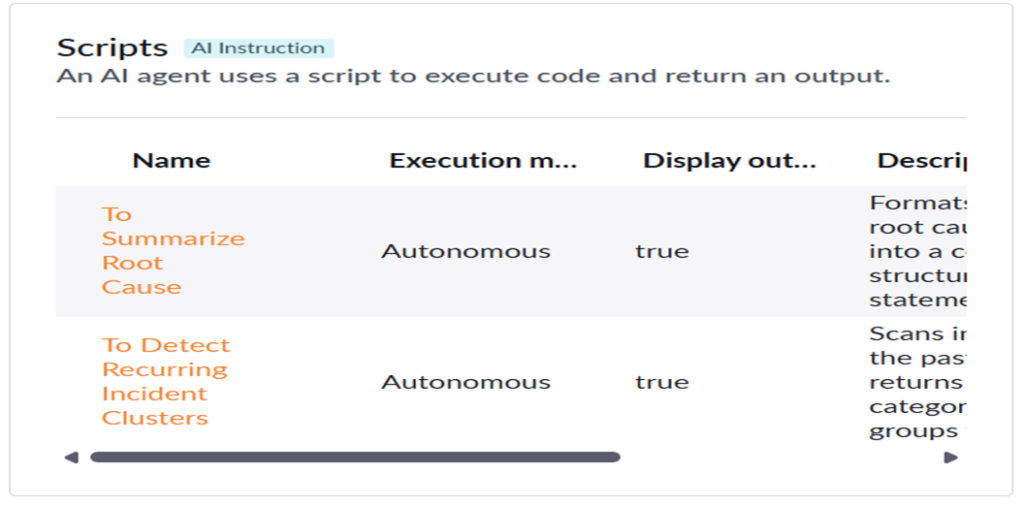
Scripts
Tool: To Summarize Root Cause
Execution mode: Autonomous
Display output: true
Description: Formats the root cause analysis into a consistent, structured problem statement.
Tool: To Detect Recurring Incident Clusters
Execution mode: Autonomous
Display output: true
Description: Scans incidents in the past N days and returns category/subcategory groups that meet the recurring cluster threshold.
Clicking Save and Continue opens the tools configuration page, where relevant tools can be added to extend the agent’s capabilities. This step can also be skipped.
Step 7: Set User Access
The User Access page allows configuration of who can interact with the agent. Access can be restricted to specific users and roles, or opened up to any authenticated user, depending on the intended scope.

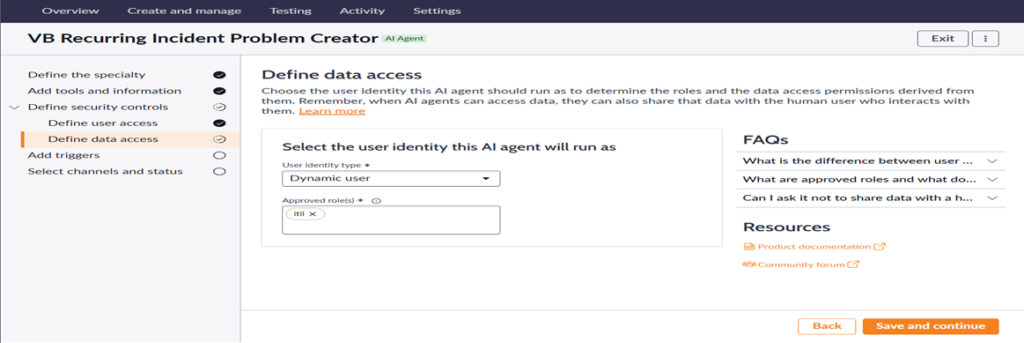
Step 8: Configure Data Access
On the Data Access page, the appropriate user identity type and approved roles are selected. This ensures the agent only accesses data it is authorized to use.
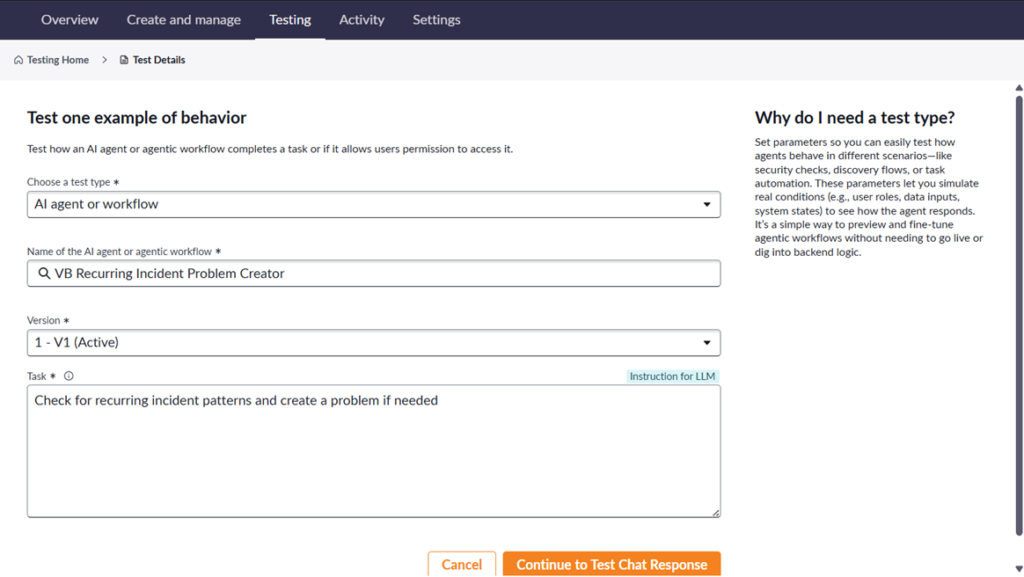
Step 9: Test the Agent
After clicking Save and Continue, the workflow proceeds directly to the Testing page. By entering the prompt “Check for recurring incident patterns and create a problem if needed”.
Step 10: Verify Successful Test Execution
The agent was run through Manual Test using the prompt “Check for recurring incident patterns and create a problem if needed.” After detecting a recurring cluster of Software/ Email incidents, the agent asked for confirmation before linking the related incidents to the newly created problem record: “I am about to link all related email incidents to the newly created problem record for formal tracking and resolution. Is it okay to proceed?” Upon confirming with
“Yes,” the agent completed the final step and returned the following: {“message”:”5 out of 5 records updated in the Incident table.”,
“detailedMessage”:”5 records completely updated:[“22330e493b660358d0f0020f23e45a71″,”2415eec5fbeacfd470ccf1a315efdc1a”,”97b38e853b660358d0f0020f23e45a76″,”9a4a2cb81ba29e10059ea79b234bcb3a”,”a26482013ba60358d0f0020f23e45aa2″]. “,”status”:”success”}This confirmed that all 5 detected incidents were successfully linked .
